Grilling Mastery: Weber Charcoal and Gas Grills
Discover the advantages of owning a Weber Grill, how to use it for consistently great results. Grilling tips and tricks I've learned along the way and the most useful accessories.
Barry Barclay
12/6/20249 min read
This blog contains affiliate links and I may receive a small commission at no additional expense to you
My Weber Grills and I
My love affair with Weber grills has been 25 years in the making. Prior to owning one I frequently heard friends and colleagues talking about them and couldn't understand what all the fuss was about. I soon learned that my misperceptions were fed by the fact that I had been completely ignorant of the difference between a grill and a kettle grill. The distinguishing characteristic of the kettle grill is that there are two distinct methods of cooking. The direct method is the same method used on any regular grill. (the coals are directly below the food). What brings the kettle grill into a league of its own is being able to cook using the Indirect Method, which literally transforms your grill into convection oven. Now you can cook roasts, stews,smoke, even bake and more. I will discuss these methods in more detail below later.
Besides the outstanding performance of these grills, the build and aesthetics are noteworthy. My two little beauties enjoy a permanent home on my patio adding gastronomic functionality to the ambiance. I have had my Weber Q1000 gas grill for 19 years (Still going strong) and 7 years ago I replaced my 22" charcoal kettle grill which I had been with me for 18 years. These are the heros of my culinary pride. These iconic grills transformed me from an average griller into a BBQ aficionado with astounding ease.
If you crave smokey flavours, juicy meats and a little bit of outdoor fun thrown in this is the right spot for you! My charcoal grill was my first and so it seems fitting that I discuss her first.
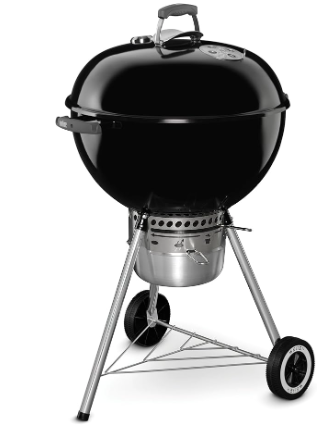
Weber Original Premium Charcoal Grill
When cooking with a charcoal fire always start with the same size fire as this way you learn a benchmark to work from. Different size kettles need different amounts of charcoal to provide for the first hour of cooking and are specified in the manual. If you own a Weber Grill and have misplaced the manual, I have provided links for them at the end of the blog.
Direct Cooking - Weber Charcoal Grill
A layer of coals are spread across the surface of the coal grid and the food is cooked directly above those coals. This is the conventional grilling method and is used when cooking cuts of meat that take less than 30 minutes to cook such as chops, steaks, burger patties, sausages etc.
Indirect Cooking - Weber Charcoal Grill
Here the coals are separated so that there are no coals directly below the food and a dripping tray is placed between them to collect the cooking juices. Your food is cooked indirectly above the drip tray.
Getting the Fire Right
Getting the fire right is crucial. Always start with the same amount of charcoal briquettes for the method of cooking that you are going to use, this will ensure that your fire is always the same temperature, the only other variable is cooking times.
Tip: Choose The Right Charcoal - Always use good quality charcoal briquettes in your kettle grill, other charcoal products burn at different temperatures for different durations which is obviously to be avoided.
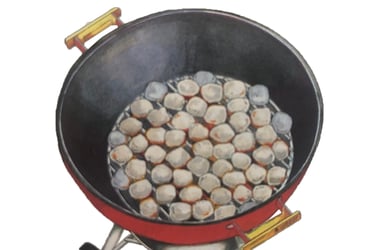
Getting the Fire Right - Direct Method
The first thing to do is to ensure that both the lid and kettle vents are set to the fully open position. Remove your cooking grid (I normally hang my cooking grid on the edge of the kettle by one handle) and place your firelighters on the coal grid. Light your firelighters and pour sufficient briquettes over them to create a single depth layer of coals across the surface of the coal grid. I normally use tongs to pile the briquettes over the firelighters. Leave the fire to burn for 20-25 minutes. Once you have glowing white coals spread them out across the coal grid, put your cooking grid back in place and you're good to go. Once you have put your meat on always put the kettle lid on, this not only speeds up the cooking process and prevents the fire from flaring up but also adds that signature Weber grill flavour.
Tip: When taking off the lid, carefully lift it and remove it sideways to reveal the cooking grid, pulling it upwards can result in ash being sucked upwards and onto your food.
Tip: If you intend grilling using the direct method frequently, Weber make an accessory called the Rapidfire Chimney Starter which makes getting your coals going easier.
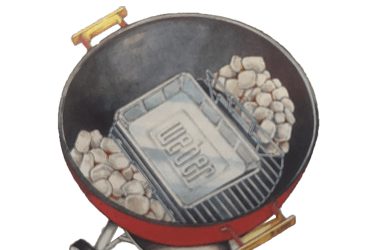
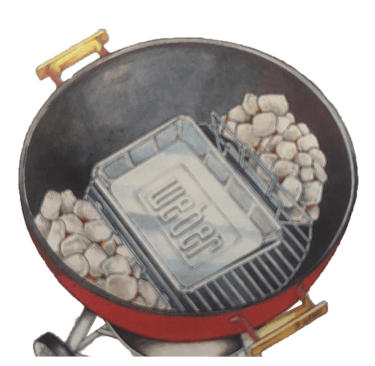
Getting the Fire Right - Indirect Method
Ensure that both the lid and kettle vents are set to the fully open position. Remove your cooking grid and put your charcoal rails in place. I normally position 3 firelighters on each side equidistantly . Light the firelighters and add 25 briquettes on each side of the fire. This provides 60 minutes of cooking time on a 22" kettle grill. Leave the fire to burn for 20-25 minutes , once you have glowing white coals on each side it is time to place your cut of meat on the cooking grid above the drip tray. Replace the kettle lid and let your meat sizzle to magnificence. These kettle grills cook so evenly that it is not normally necessary to turn your meat during the cooking process. If your cut of meat requires more than an hour of cooking, after the first hour add 8 briquettes to each side of the fire and repeat the process each consecutive hour.
Tip: When cooking with the indirect method take care to align the cooking grid flaps over the fires so that coals can easily be added as necessary.
Tip: I frequently add the drippings from the drip tray to my gravies.
Cooking Times
Now that you know how to always have the same cooking temperature in your kettle it's far easier to gauge cooking times. The two primary approaches to calculate cooking times are:
Manually: Depending on the type of meat you are cooking your manual will prescribe a cooking time per 500 grams to rare, medium or well done. This is the method that I have always used and I have never experienced any disappointments. I use my Smartphone timer to keep track of things.
Monitoring Internal Temperature: There are accessories available where you insert a probe into the thickest part of your meat to measure the temperature of the meat while it is cooking. Some come with WiFi and Bluetooth and can be paired with your Smartphone App such as Weber Connect allowing remote monitoring and alerts. Browse the Range here
More Useful Charcoal Kettle Grill Tips
There are multiple sources for Weber recipes on websites, social media platforms, in forums and books. I recently downloaded the Weber Connect App which includes hundreds of recipes and more get added all the time.
Cooking times are always stipulated in the recipes. Always take note of the weight of the meat you intend cooking.
When using your kettle grill both the kettle and the lid get very hot, take precautions if you have young children or pets around.
Take care not to drop the lid of your kettle on hard surfaces as it could damage the enamel coating.
There is an abundance of accessories available for Weber Kettle grills. The most useful one for me is the Three Sided Grill Cleaning Brush. Once my fire is hot I just brush the grill, it does a great cleaning job and I'm ready to go. If I'm cooking white meat like chicken or pork I also give the grill a quick wipe with a double layer of paper towels.
Once you are done cooking close both air vents as this will prevent any ash from blowing around your patio, your fire will die sooner leaving you with some easy-to-light partially burned briquettes that will help get your next fire going.
Windy or cold conditions can slow down the cooking process so allow for additional cooking time.
In windy conditions position your kettle so that both the lid and kettle vents are on lt leeward side of the prevailing wind. You can also partially close the vents.
First prize is to store your kettle grill in a covered place away from direct rain or sun. This way it will last for years.
Keep your kettle grill clean, if you keep reheating it with marks on it they will become difficult to remove. There are videos on Youtube covering cleaning materials and techniques.
You can Browse the Charcoal Grill Range Here
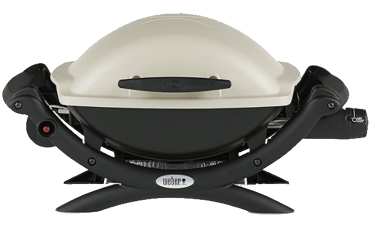
That concludes what I have to offer for Charcoal Grilling so let's move on to to the other baby, my Q1000 Gas grill.
The first thing I need to emphasize about the Q1000 is the utter convenience of having a kettle grill that you can turn on and be cooking in 10 minutes. I use mine virtually every second day to enjoy delicious dinners. Another huge advantage is portability, no problem whether you're heading out for a picnic or helping a friend out with some extra sizzle space for that special occasion. Last but not least the build quality of this product is nothing short of exceptional.
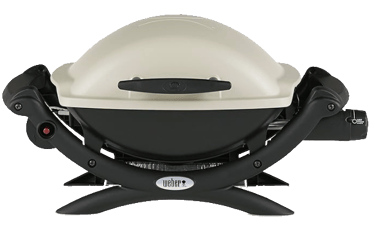
Q1000 Cooking with the Direct Method.
It's as simple as Opening the lid, flipping the side tables out; on with the gas, hit the built in striker (you will hear the fire whoosh to life), close the lid, leave it to preheat for 10 minutes and you're ready to cook. The start setting is the highest setting, once the fire is going I normally dial it back about 15% for preheating. Again, always cook with the lid down as it speeds up the cooking process, prevents fire flare ups and also adds that signature Weber grill flavour.
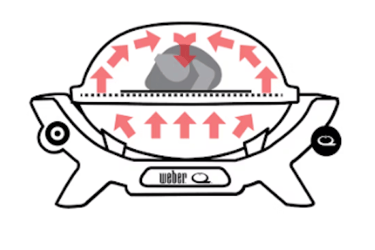
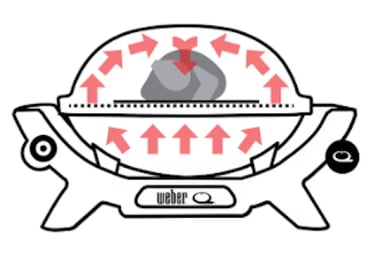
Q1000 Cooking with the Indirect Method.
Cooking using the indirect method on the Q1000 requires us to make a small modification to convert the grill into an oven. Because the gas burner is fixed we need to shield the food from the direct heat of the burner below. This is done by laying an adequately sized piece of foil or a convection tray on the cooking grate and placing a stainless steel trivet on top of the foil which lifts the meat off the hot grill bars while the foil shields it from the direct heat from the burner below. The heat is now forced out to the sides so that it circulates evenly all around the food.
Tip: At first I found it quite easy to forget to switch off the fire once I was done cooking, so I set a hard and fast rule that no food comes off the grid until the fire is off. So far so good...
More Useful Q1000 Gas Grill Tips
There are multiple sources for Weber recipes on websites, social media platforms, in forums and books. I recently downloaded the Weber Connect App which includes hundreds of recipes and more get added all the time.
Cooking times are always stipulated in the recipes. Always take note of the weight of the meat you intend cooking. I use my Smartphone timer to keep on top of cooking times.
There is an abundance of accessories available for Weber Q1000 Kettle grills. The most useful one for me is the Three Sided Grill Cleaning Brush. and the Bonnet Grill Cover. The cover fits snugly and keeps your gas grill in pristine condition while not in use.
Depending on the country you are in, your Q1000 will come equipped to either use disposable gas cartridges or the larger LPG canisters for home use. Should you wish to convert from disposables to the large canisters there are adapter kits available to do this.
Windy or cold conditions can slow down the cooking process so allow for additional cooking time.
In windy conditions position your Q1000 so that the front of the grill faces in to the wind.
First prize is to store your kettle grill in a covered place away from direct rain or sun. This way it will last for years.
Keep your kettle grill clean, if you keep reheating it with marks on it they will become difficult to remove. There are videos on Youtube covering cleaning materials and techniques.
You can Browse the Q Grill series here
These works of art are not just grilling tools, you will find that they cause an invitation to gather friends and family, share stories and create lasting memories over the most delicious meals. To me my Weber grills are precious lifestyle enhancement tools that I cherish almost on a daily basis. They put panache into my outdoor cooking adventures and they can do the same for you and yours too.
Weber Assembly and User Manuals
Feature picture background designed by Freepik